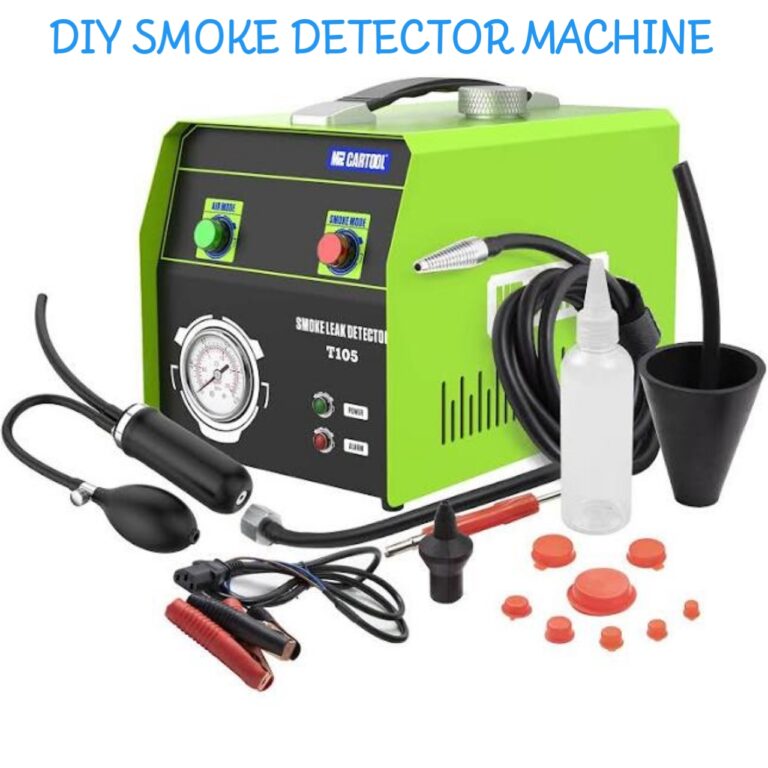
I’ll show you how you can build your own simple smoke machine detector to locate vacuum leaks on your automotive vehicles.
If you notice a chance of a leak on your EVAP (Evaporative Emission Control system) system and, after doing the visual inspection, you cannot locate the spot, then I recommend you check out this article.
The best way to detect any Vacuum, exhaust, or engine leaks is to apply smoke, which can be achieved using an automotive smoke machine.
Although you can purchase a high-volume fog machine for as low as $400 upwards, which at times isn’t budget-friendly.
In this article, I will show you two guides on making a smoke machine for your car. The first will be long and tedious, and the second will be brief and precise.
The first looks more professional and requires more tools, but the latter is achievable with readily available materials. Either way, all of them work perfectly, depending on your preference.
But before we learn how to create a smoke machine, let’s see the possible reasons cars smoke.
Why do Cars Smoke?
Listed below are possible reasons why your automotive vehicle suddenly starts bringing out smoke.
- Overheating – When the engine is overheating, you’ll notice excess smoke coming out from the exhaust or engine.
- Overheated Liquids, e.g., oil, transmission fluids, and brake oil
- Faulty wire casing
- The heated remainder of the engine block
- Fault in the coolant system. E.g., fan blades
- Low or bad engine oil etc.
There are many more possible reasons why your car will smoke, but it’s best to meet your car engineer if you notice too much smoke output.
Nevertheless, remember I said earlier a vacuum, engine, or exhaust leak might cause that car to smoke. So, let’s see how to create a simple smoke detector for your car in 5mins.
How to Make Smoke Machines for Automotive
This is the first guide, and as I said earlier, you’ll need a couple of things to get our smoke machine detector working.
Let’s see the requirements.
Requirements to Build an Automotive Smoke Machine
- PVC closet Flange – Buy Now
- Clean out Adapter
- PVC Glue
- Tape
- 1½ Drill Bit – Buy Now
- ½ Torch Wick
- Welding Wire – Buy Now
- Soldering Iron – Buy Now
- Multimeter
- Two ¼ bolt
- Car charger Adapter with Amp fuse(Cut Charging port)
- Ring Crimp Terminal – Buy Now
- Air compressor Fittings
- Stepper Bit
- Air Hose – Buy Now
- Baby Oil – Buy Now
- 12V motor Battery for testing
- Pressure blocking plug
Now, that’s a lot of requirements, but you should try to get a professional vacuum leak detector for your car.
I’ll attach links to some products above and I’ll get an affiliate commission when you purchase from any of them. Thank you.
- Start by gluing the PVC closet Flange with the other half of the Clean out Adapter using glue.
- Now, measure 1½ inches using the tape and make two holes vertical to each other using the quarter drill bits.
- Next, get the torch wick to the correct width and length by cutting off the excesses while ensuring it also touches the bottom of the Closet Flange.
- Make a mark on both sides of the wick to know where the wire stops on each end (width)
- Next, get a welding wire off approximately 30 inches. You can check the ohms by sliding through the multimeter gauge.
- Now, wrap the welding wire around the torch wick (it’s not compulsory to make the spaces equal but try not to make one touch the other)
- Get the ¼ bolts and wrap the two on each side (width of the wick) of the torch wick using some part of the welding wire.
- Next, place the wick inside the closet and push in the quarter-inch bolt inside of the holes made (sideways)
- Get your battery charger and cut off the charging port, replacing it with the ring terminal.
- Cut the small rubber grommet into two and use it to seal each side of the bolts.
- Insert both ends of the ring terminal in the bolt and screw it up.
- Next is to drill two holes, one to let air in and another to let the air out using the air compressor Fittings.
- Make two holes using the stepper bit around ½ length and 100° to each other.
- Insert the compressor Fittings inside it and screw it to fit
- Now, attach your air hose to one end of the compressor Fittings
- Then pour your oil into the glued container, moistening the wick with extra oils at the bottom.
- You can test it out without the top by connecting the head of the batter to a 12V battery or any motor battery of your choice, and you’ll see smoke coming out from the smoke machine.
- Now close the mouth of the clean-out Adapter.
- Additionally, adding the Pressure blocking plug after you’ve closed the clean-out Adapter is advisable. So that if pressure is built into the system, it’ll blow out the plug instead of destroying the smoke detector machine.
- Next, go to your car and connect your Vacuum line leading to the EVAP system to the smoke machine.
- Connect your car battery.
- Now, check for any location where smoke might come up.
You might consider taking your car to a technician if the cause of the smoke overweighs your control for an immediate fix before it escalates to something costlier.
That’s all about making a smoke detection system for your automotive vehicles.
Let’s quickly see the best alternative to building the perfect smoke machine.
Alternative Method to Build Smoke Machines for Automotives
Requirements:
- A glass container with a lid inclusive
- A BIC Pen
- Cheap Soldering Iron – Buy Now
- Bicycle Pump – Buy Now
- Vinyl Hoe
- Epoxy Glue
- Cotton Socks
- Baby Oil – Buy Now
How to Make a Homemade Smoke Tester Machine
- Cut off the piece of the pen to create a hole on both sides
- Remove the lid and the extra plastic attached at the bottom
- Drill three holes in the lid of the glass container. The middle should contain the soldering iron, and the left and right holes should contact the pen and cover.
- Now, hold the epoxy glue on both sides of the glass container cover for up to 6mins to ensure an airtight seal.
- Next, you can screw the container cover onto the jar.
- Then attach the bicycle air pump onto the pen and the vinyl hoe to the lid.
- Now, open the lid and put your cotton socks in with a lot of baby oil. Make sure it soaks well – to avoid burning.
- Finally, connect your soldering iron to electricity and give it time to heat up. You can now see smoke emerging from the system we’ve built.
- You can now go ahead and connect the hose to your car vacuum and then pump air into it using the bicycle pump.
Watch out for any smoke leakage in your car system and report to your engineer if you can’t fix it.
That’s it.
FAQs
Can you use a Smoke Machine in a Car?
Yes, you can, but you’ll need to ensure your car is off before using the vacuum detector.
Before attaching the machine to your car, you must close the purge solenoid and gas cap.
That’s all for now.
Conclusion.
With this article, I hope you’ve learned how to make a smoke machine for your automobile and you can now perform a do-it-yourself smoke test on your car.
Kindly drop a comment below.
As an Amazon Service LLC Program Associate, V. Auto Basics earns from qualifying purchases. See Our Affiliate disclaimer.
